For this lab we simulated using a multi-rotor aircraft in an automated mission while also going through all the preflight checks. To plan the mission we used a mission planning software called Mission Planner. Once we created our own theoretical mission, we went outside to practice going through the pre flight checks from a pilot at command perspective and a pilot at the controls perspective.
Study Area:
There really was not a study area since this was just practice for flying a mission, but in the mission planning software we did "plan" our mission on the baseball diamonds south of Eau Claire South Middle School (Figure 1). While we went through the preflight checklists we were just outside Phillips Hall in the Campus Mall at UWEC (Figure 2). While we were going though the preflight checks, we had winds at 3 miles per hour out of the south southeast and cumuloaltostratus clouds aloft. There was periodic times where we had moments of no wind at all which would have made for interesting flying conditions.
 |
| Figure 1: Location of the Mission Planning software demo. |
 |
| Figure 2: Location of Preflight Simulation demo |
Methods:
We were first introduced to the Mission Planner in the lab where we went over all the different decisions that need to be made to assure that you have the optimally planned your flight. One aspect of UAS is that they cannot stay in the air for an indefinite amount of time and therefore they need to land due to battery loss. By orienting the flight path in a different way however, we can save time so that we can fly the whole mission without having to switch out batteries. For example we can fly a field that is 50 meters by 75 meters two different ways. One way is to make 50 meter swaths (Figure 3) and then turn around and line up for the next swath through. This is acceptable however, if we made 100 foot swaths (Figure 4) we would limit the amount of time needed to turn around for the next swath. This would save time and money and make the flight much more efficient. You can see that changing the angle to your advantage, shortens the flight time. It may not be much on this mission but for others it can be an astronomical difference and can be the deciding factor on whether or not you can fly.
 |
| Figure 3: Mission Planning software showing a less efficient flight path. |
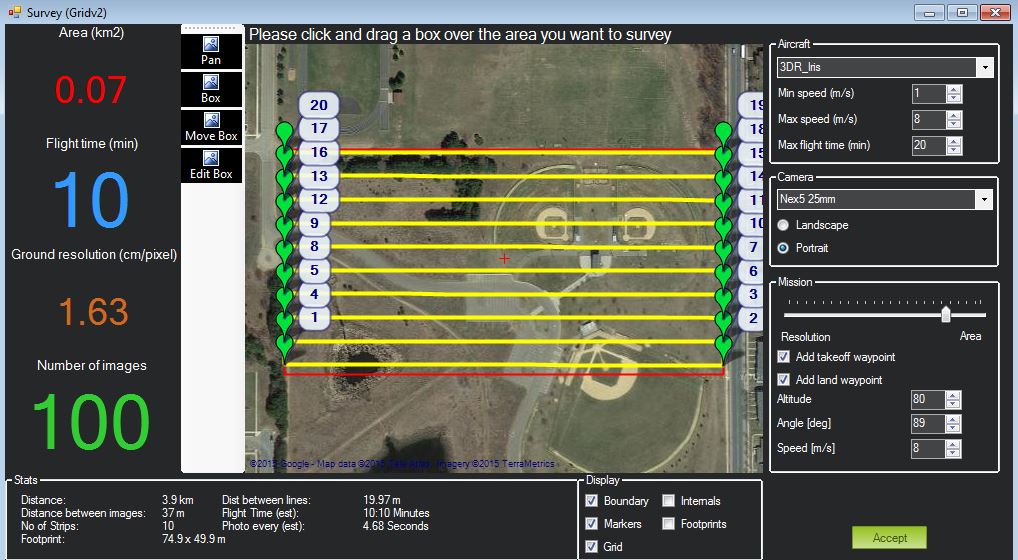 |
| Figure 4: Mission Planning software showing a more efficient flight path. |
For our second part of the lab we went outside to simulate going through the checklist of taking off with a multi rotor aircraft. During this process, a team is made up of two to three people. The first person is the Pilot at the Controls (PAC) who is in charge of the checklist and all the conditions of the flight. The PAC is on the computer making sure that the mission planning software is linked with the aircraft and that all the preflight checks are being made. The pilot in control (PIC) is hands on with the aircraft, actually doing all the checks that the PAC is reading off. Some of the checks include making sure the prop is secure along with the battery and making sure that the transmitter (TX) is ready to go. The third person would be the spotter who is pretty much helping the other two and making the sure that the flight area is consistently secure. You can look at Table 1 for a complete listing of the preflight checks as well as the multicopter log (Table 2) which records who is the PAC, PIC, and spotter is, along with the actual flight data.
 |
| Table 1: Multicopter Check List showing all the different preflight, flight, and postflight checks. |
 |
| Table 2: Multicopter Log Book showing all the flight data. |
There isn't much for results in this lab since no data was produced, but we still gained valuable knowledge as far as how to safely and efficiently start a mission. Without going through all the preflight checks, you could easily forget to do something very important and that could result in a major crash and injury to the aircraft or injury to one of the pilots or a helpless bystander. One of the checks that I found very important is to keep the flight area secure. If there are bystanders in the area and something goes wrong they could start to panic and then have a very negative view of UAS and UAVs. This would be an insult to the entire UAS industry which if you haven't noticed, is already going through a lot of political backlash due to the nature of UAS. Most people may not understand UAS, but by having a record of preflight checks along with a logbook, people can be held responsible for their actions and the public can begin to trust UAS pilots and realize that the opportunities that can come from this systems are endless and can help many people.
Conclusion:
Now that we have learned how to create missions and the checks needed to actually start them, we can enter the next step of learning more about UAS. This can include the actual flying of the aircrafts, as well as image processing and many more avenues. None of these are possible however with making sure that everything is safe and that the UAV is functioning properly.


